Our LULC raster has DN values in its pixels and we have labeled it by symbology under different classes like ‘WaterBodies’, ‘Forest’, ‘Urban’ etc. But unlike vectors we can’t directly store values in raster creating a new field in open attribute table explaining DN ‘1’ means ‘WaterBodies’ or something like that. Also raster with DN value meanings(like forest, urban etc.) can be used later to give rank to different classes in Multicriteria Decision Analysis.
So, its very important to insert naming or have other field in raster. This can be done simply by coverting raster to vector; adding a new field and again converting back to raster.
Lets see how this can be done in QGIS.
Step1: Load the raster in QGIS layer panel.
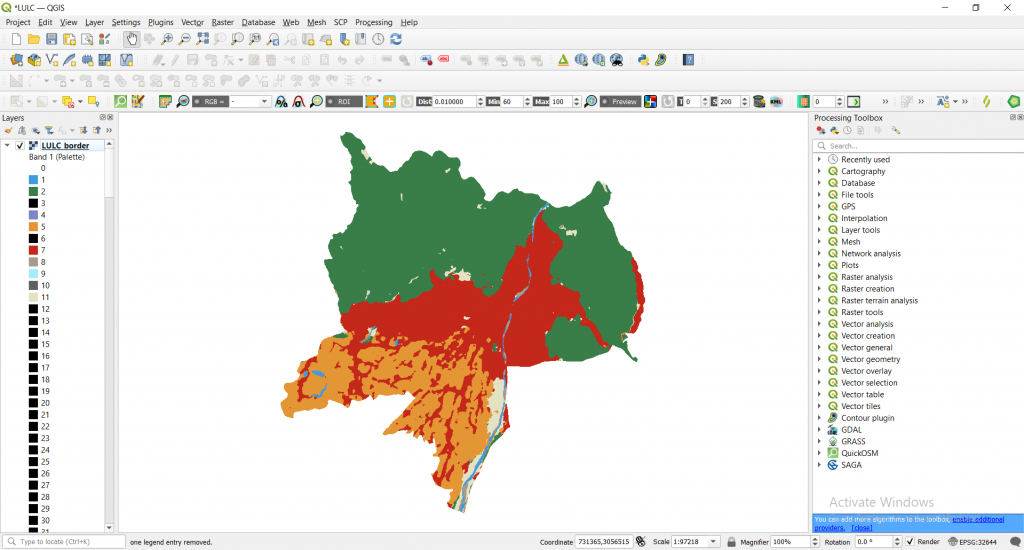
Step2: Symbology
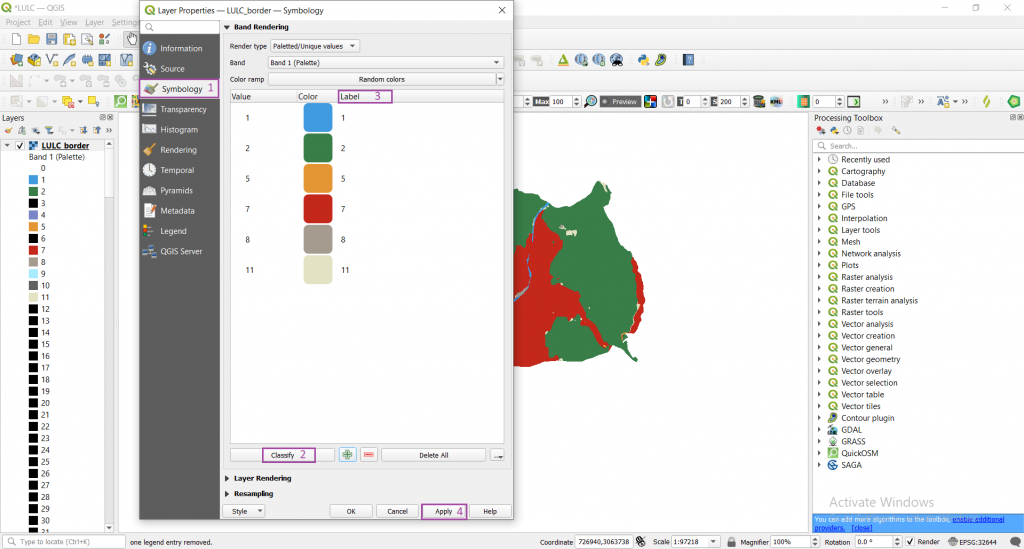
Go to Symbology of LULC_border(by doble left clicking it) -> classify -> click on labels and edit them like 1 as ‘WaterBodies’, 2 as ‘Forest’ and so on and finally apply.
You will see the following output.
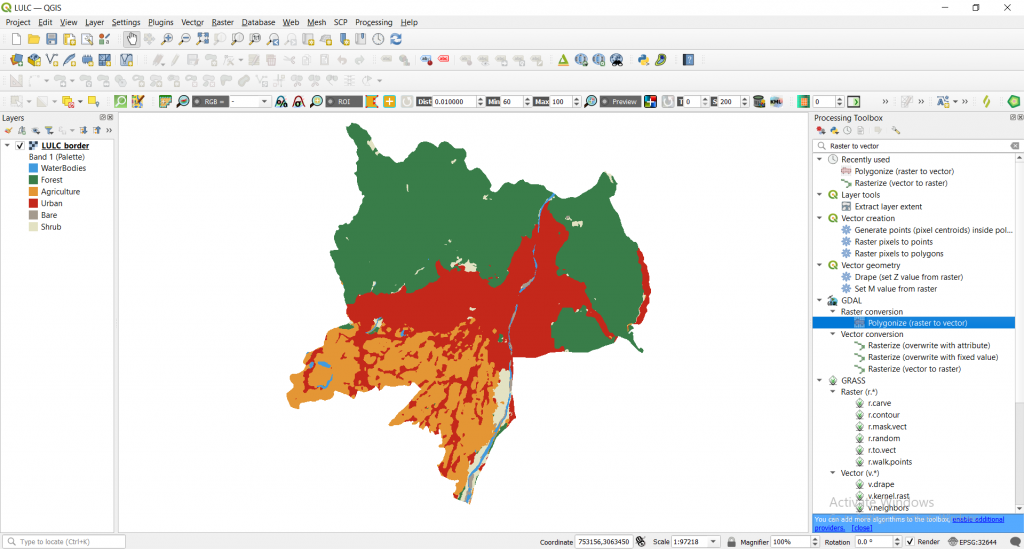
Step3: Polygonize and Parameters settings
Go to Processing Toolbox -> search ‘Raster to Vector’ -> click ‘Polygonize(raster to vector)’ under Raster conversion of GDAL section
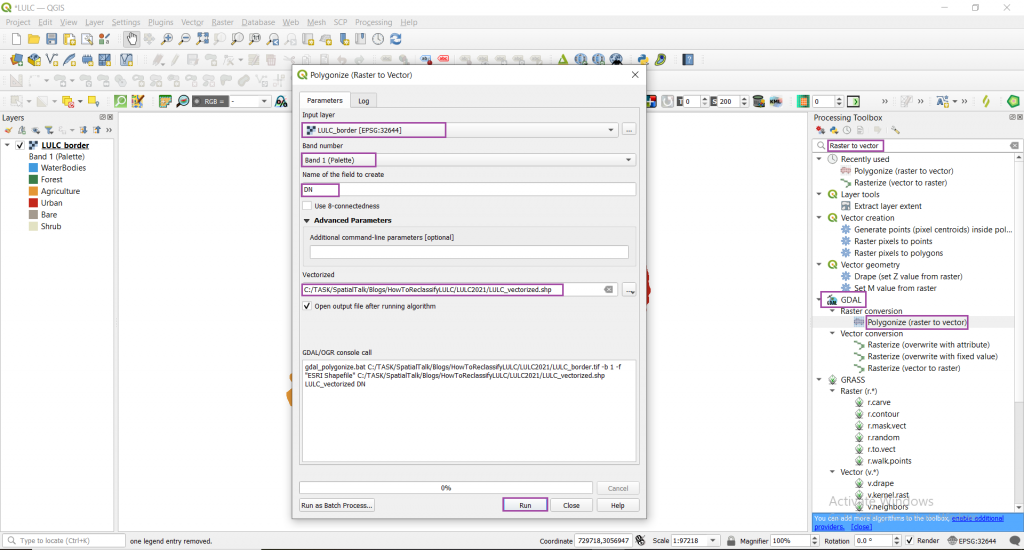
A window of parameters will open where adjust the following settings
Choose Input layer as ‘LULC_border’, Band number as ‘Band1(Palettee)’, leave ‘DN’ as it as under Name of field to create, save to a file as ‘LULC_vectorized’ and finally hit run.
You will see the following output.
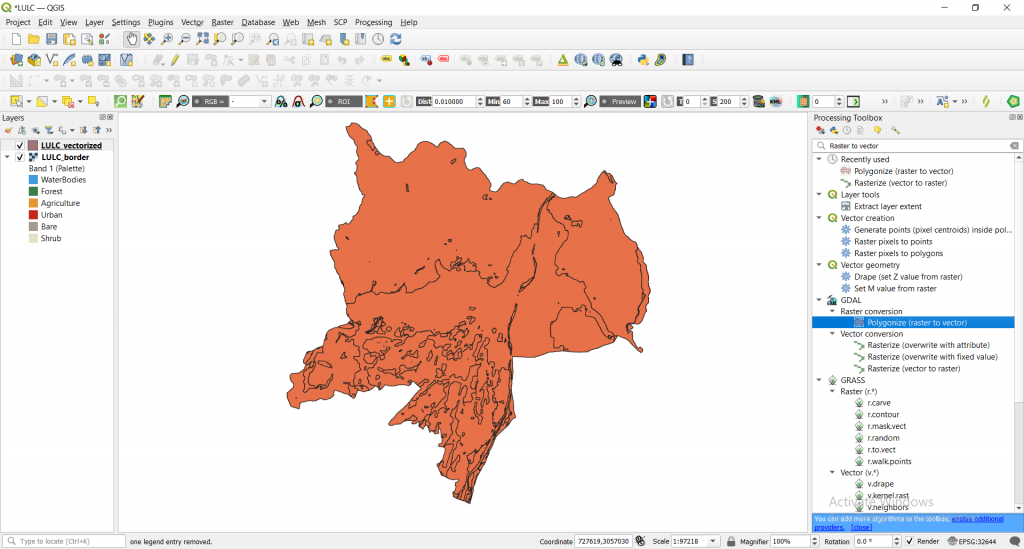
Step4: Right click ‘LULC_vectorized’ -> open attribute table
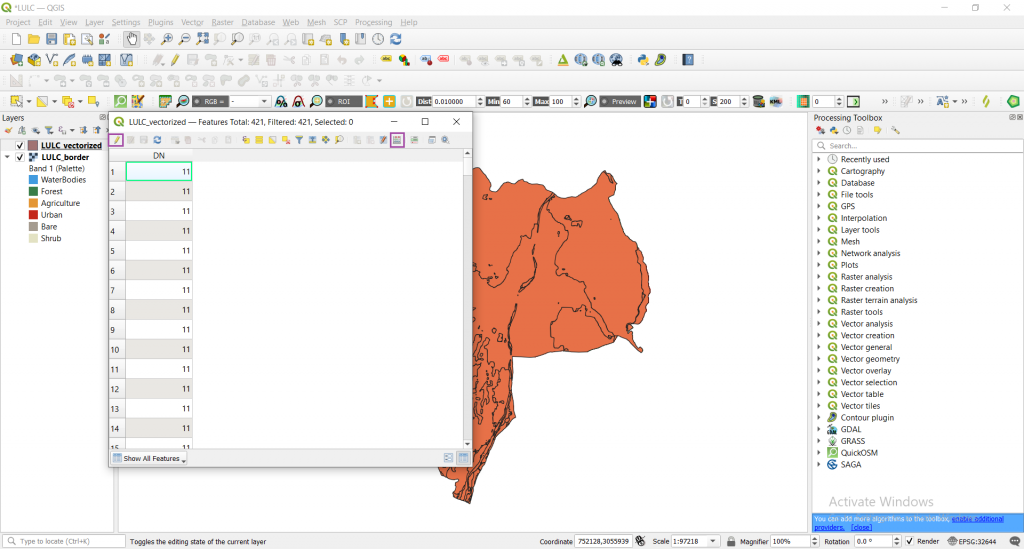
Now we will create a new field ‘Type’ and give value of that field according to DN values. For example if DN value is 1 then we will assign ‘WaterBodies’ as Type, if 2 then ‘Forest’ and so on using ‘Raster calculator’.
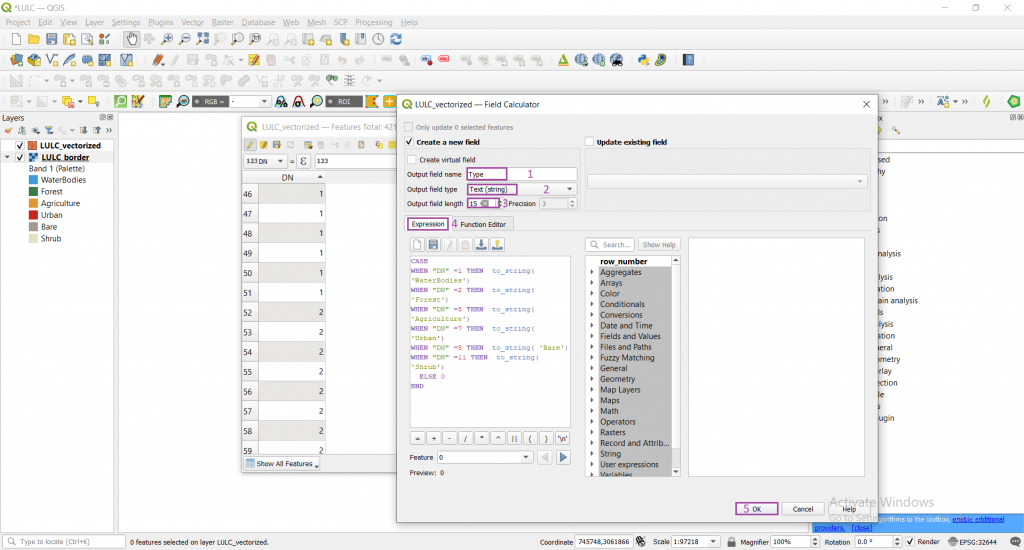
Step5: Click toogle editing(pressing pen like tool) -> Raster calculator(present at right side) -> Input output field name as ‘Type’, field type as ‘Text’, output field length ‘15’, in expression tab enter following code
CASE
WHEN “DN” =1 THEN to_string( ‘WaterBodies’)
WHEN “DN” =2 THEN to_string( ‘Forest’)
WHEN “DN” =5 THEN to_string( ‘Agriculture’)
WHEN “DN” =7 THEN to_string( ‘Urban’)
WHEN “DN” =8 THEN to_string( ‘Bare’)
WHEN “DN” =11 THEN to_string( ‘Shrub’)
ELSE 0
END
Finally hit ok.
If everything is fine you will be the following output.
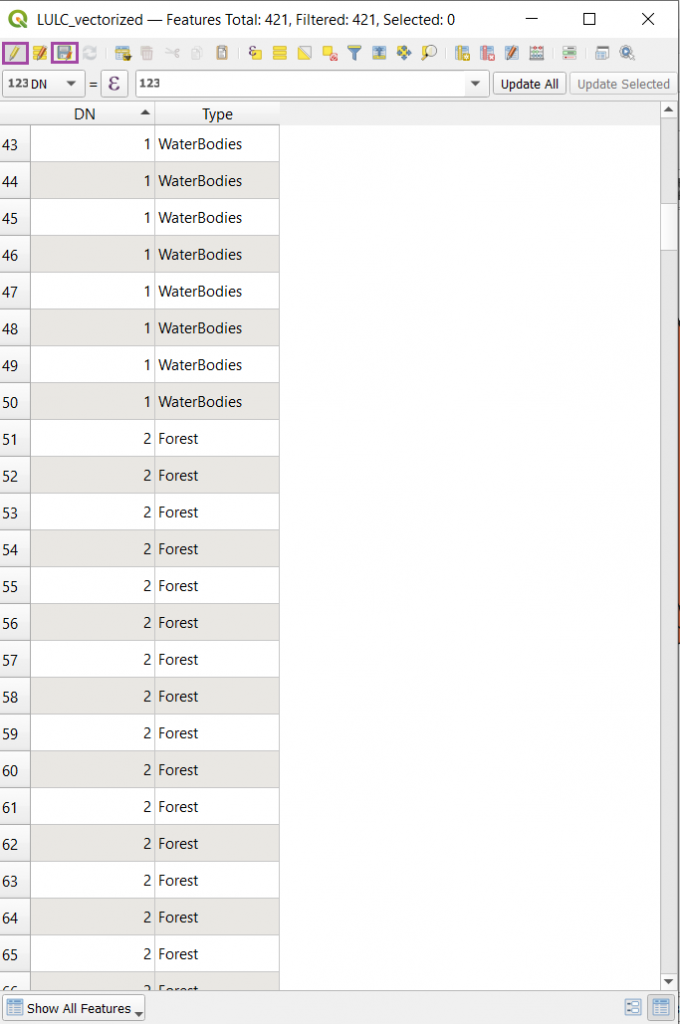
At last save it and close editing.
That’s it. Now if you want you can convert this vector to raster and do further analysis.


